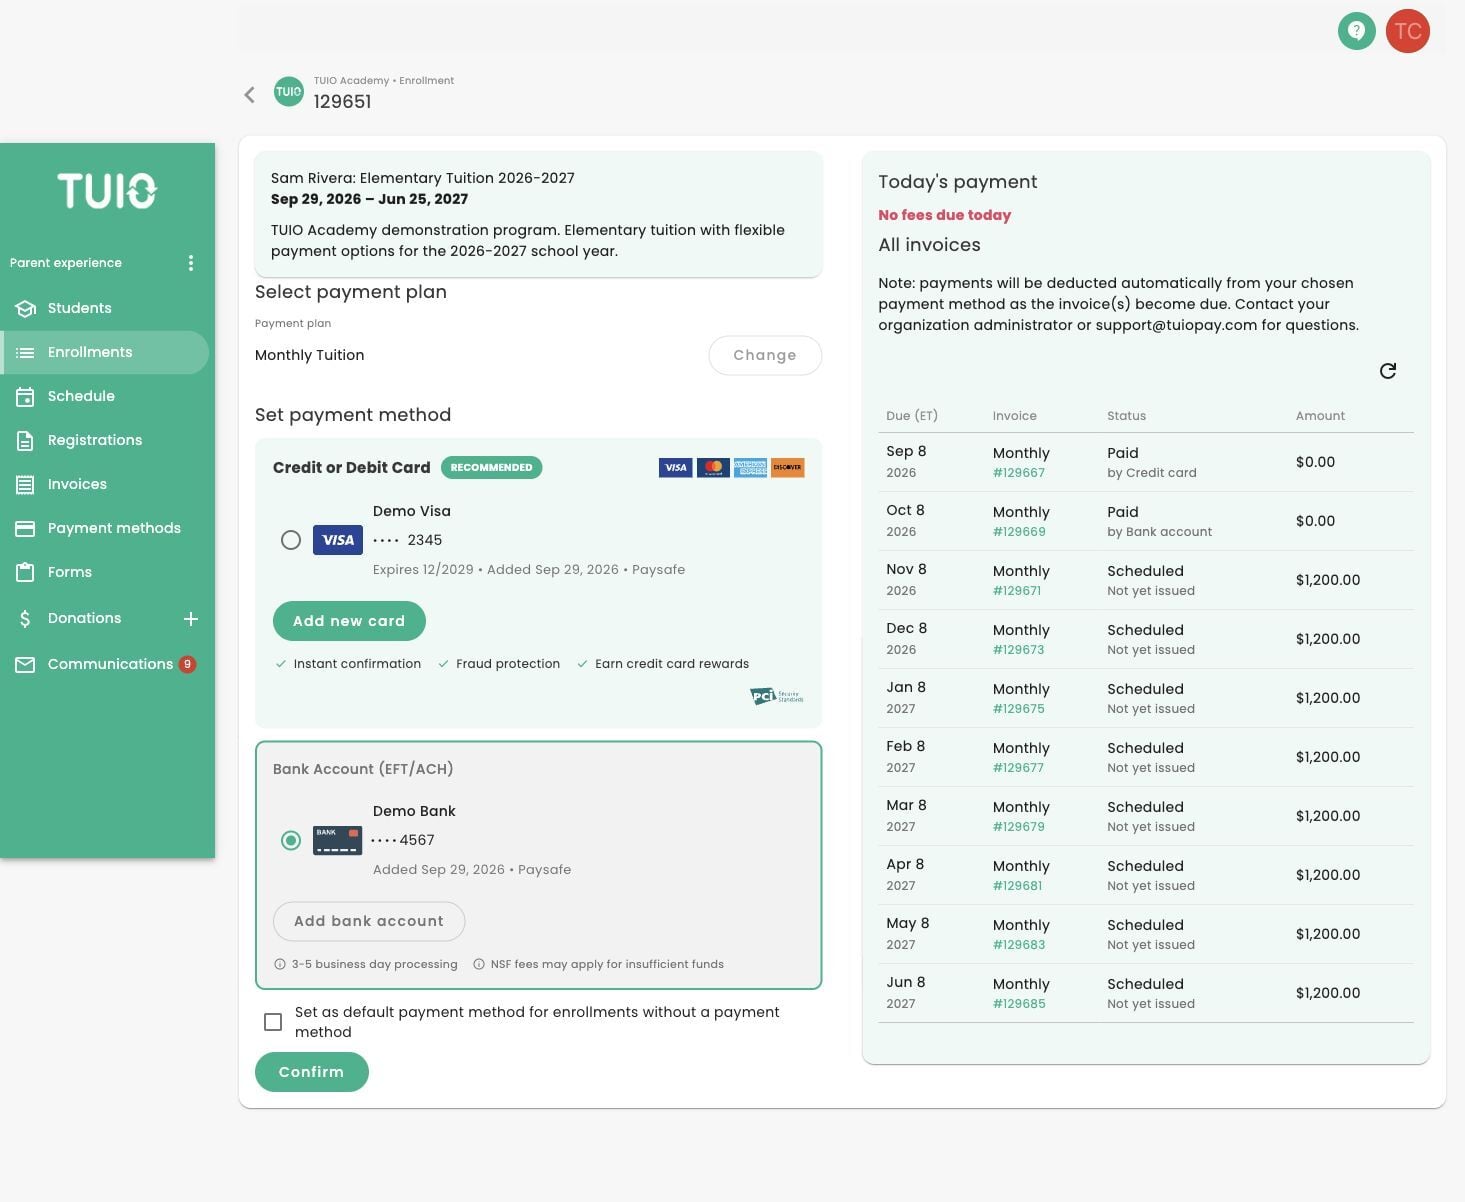
Payment setup connects an enrollment to a payment plan and payment method. Adding a card or bank account alone does not finish the enrollment setup.
Set up an enrollment payment
- Open Enrollments and select the relevant enrollment or Setup payment link.
- Under Select payment plan, review the plan. Use Change if the school has made other plans available.
- Under Set payment method, choose an existing method or use Add new card or Add bank account, when offered.
- Review Today's payment and All invoices. Check the amount due now, future due dates, and any fees before proceeding.
- If shown, select Set as default payment method for enrollments without a payment method only if you want that broader assignment.
- Click Confirm to finish. Confirmation can start eligible due or overdue payments, so review the displayed amount first.
If a payment is already in progress, check its status before attempting another payment. If a method or plan is unavailable, contact your school.
Your available plans, methods, amounts and fees depend on your enrollment.
How To Add A Bank Account
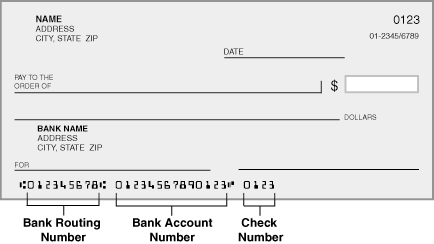
US Void Check
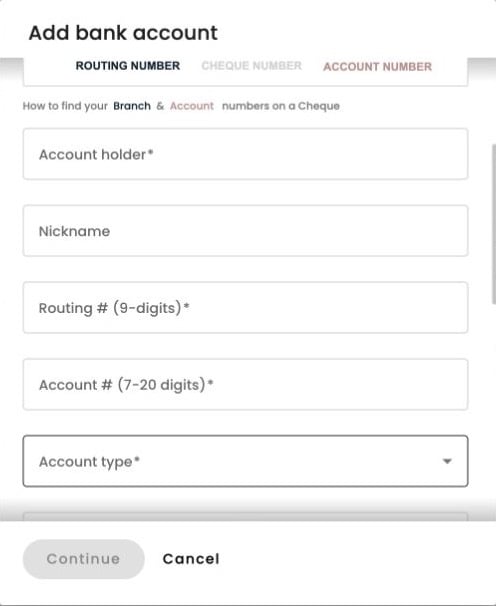
Whether you add a bank account on the payment plan choice page or the 'Payment Methods' tab on the TUIO app, you will be asked to provide the Routing and Account numbers that can be found on a check, as per the image example(s) below.
- Do not include any dash, space or other symbol; the data entered in the routing and account numbers should be digits only.
- The address should be your home address that's registered with the bank, not the branch/bank address.
- Enter the routing and account numbers exactly as provided by your bank for electronic payments, including any leading zeros supplied by the bank. If TUIO does not accept them, confirm the details with your bank or contact TUIO support. Do not add zeros just to make a number fit.
Canadian Void Cheque
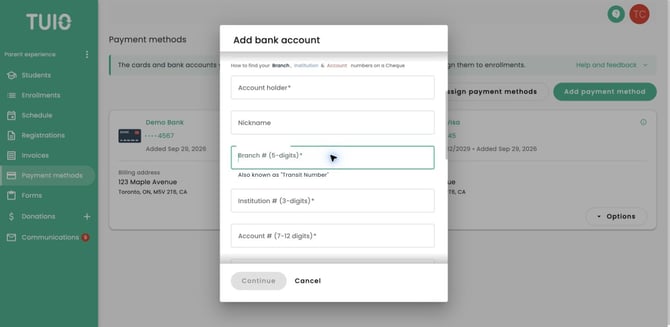
Whether you add a bank account on the payment plan choice page or the 'Payment Methods' tab on the TUIO app, you will be asked to provide the Branch, Institution and Account numbers that can be found on a cheque, as per the image example(s) below.
- Do not include any dash, space or other symbol; the data entered in the branch, institution and account fields should be digits only.
- The address should be your home address that's registered with the bank, not the branch/bank address.
- Enter the account number exactly as provided by your bank for electronic payments, including any leading zeros supplied by the bank. If TUIO does not accept it, confirm the details with your bank or contact TUIO support. Do not add zeros just to make a number fit.
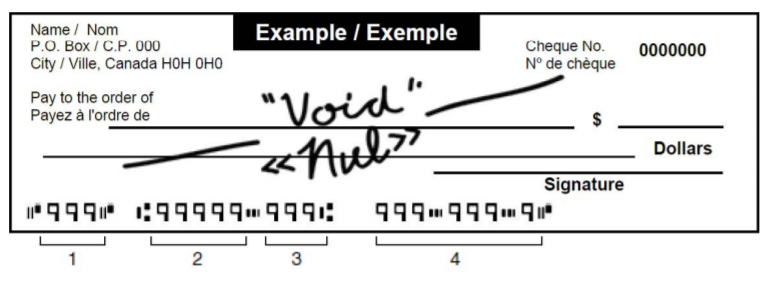
1: Cheque number - ignore
2: Branch number - 5 digits
3: Institution number - 3 digits
4: Account number - as shown on cheque
Enter the Account holder name as registered with the bank. Read the linked terms and select I agree to the pre-authorized debit terms before saving the bank account. Opening the terms link does not select the checkbox.
If you are setting up an enrollment, review the payment plan, payment method and amount due now, then select Confirm to finish. Saving a method alone does not complete enrollment payment setup. Confirmation can start eligible due or overdue payments, so review the amount shown first.
Paying a specific invoice
To make a payment on an individual invoice, see How to pay an invoice with Pay now. Check whether a payment is already processing before trying again. Choosing a method for future enrollment payments is separate from paying that invoice.
Canadian bank account fields
The screenshot shows the Canadian account-holder, branch/transit, institution and account-number fields. Scroll within the dialog to complete the remaining account and address details and review the pre-authorized debit terms. Use the numbers supplied by your bank.
US bank account fields
Enter the account holder, routing number and account number supplied by your bank, then choose the account type. Scroll within the dialog to complete your address and review the pre-authorized debit terms.